My Blinkie

My Favorite Forums


Blogs I Love



Popular Posts
-
 Click the Image above to go to download, Please do not share, If you want to share please share this page link. Hope you like it, please le...
 -
 I have a new Freebie Kit for you, I hope you all like it. Not All is showing. Please Read TOU before using To get the kit click on the prev...
 -
 This tutorial is my own “ Linda Atkins aka Lynx the Minx Designs” any resemblance to any other, is only coincidence and not intentional. I a...
 -
 This tutorial is my own “ Linda Atkins aka Lynx the Minx Designs” any resemblance to any other, is only coincidence and not intentional. I a...
 -
 This tutorial is my own “ Linda Atkins aka Lynx the Minx Designs” any resemblance to any other, is only coincidence and not intentional. I...
 -
 is tutorial is my own “ Linda Atkins aka Lynx the Minx Designs” any resemblance to any other, is only coincidence and not intentional. I am ...
 -
 Please do not claim these as your own, Do not change the file names. If sharing please only give the link to these to my Blogspot. Hope you ...
 -
 Welcome to the Creative Chicks 2024 Autumn, Halloween, Thanksgiving Blog Train! We have Autumn, Halloween, and Thanksgiving goodies to share...
 -
 Please do not claim these as your own, Do not change the file names. If sharing please only give the link to these to my Blogspot. Hope you ...
 -
 This tutorial is my own “ Linda Atkins aka Lynx the Minx Designs” any resemblance to any other, is only coincidence and not intentional. I a...
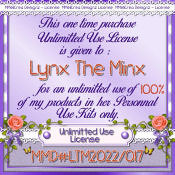
CU License
CU4CU Tube Licenses
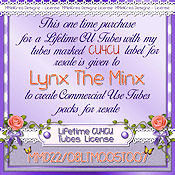
CU License
CU License
CUCU License
CU License
Free CU License



This
tutorial is my own
“Linda
Atkins aka Lynx the Minx Designs”
any resemblance to any
other,
is only coincidence and not intentional.
I am using PSP
X
This should work with any other PSP/Corel.
Written: 02.27.24
..........................................
I
am using a PTU kit called “St.Patties Green is Gold”
by me
“Lynx the Minx”
You can find it at this store
“Lynx
the Minx Designs”
The
Tube I am using comes from “The
Creative Chicks”,
The Artist ©ANA
RASHA.
If you use the tube,
please be sure to add artist copyright.
Font
of choice,
I am using “Irish
Uncialfabeta”
This
is a FTU Font,
You can find it at “Font
Space”
Mask of choice
I am using “Lynx-Mask13 ”
You can find it “Here”
Animation
by “Sophisticat Simone”
You can fine it here …
“Scrappy
Bit of Fun”
You
will need filter
“Xero”
Drop
Shadow
Vertical:3 Horizontal:2 – Opacity: 80 – Blur: 10
Let's get started …
If
you want to animated your tag, follow this tutorial.
If not then
just duplicate your paper and close original
Open New Image 800x800 pixels – White #ffffff
Open
LTM_StPatricks_Background 4
Copy – Paste as new layer on new
image
Close original
Layers
Load/Save Mask - Load Mask
From Disk
Layers - Merge Group
Merge Down
I
added Tube
Resize 461x613 pixels – Drop Shadow
Bottom
of tube use your Selection Tool/Rectangle/Feather
30%
delete
Selection None (CTRL+D)
Front of Tube
LTM_spgig_element14
– Resize 40% - Drop Shadow
LTM_IKHD_ResellVol323_03-3 –
Resize 65% - Drop Shadow
LTM_spgig_element25 – Resize
50% - Drop Shadow
LTM_HD_IKHD_268_CU(1) – Resize 75%
-
Duplicate – Image – Mirror – Merge Down – No Drop
Shadow
LTM_spgig_element18 – Resize 50% - Drop Shadow
LTM_LMB_image18 – Resize 30% - Drop Shadow
Behind Tube
LTM_HD_IKHD_268_CU(1)
- Drop Shadow
LTM_spgig_element06 – Resize 90% - Drop
Shadow
LTM_HD_IKHD_StPattyCU(6) - Resize 85% - Drop
Shadow
LTM_spgig_element11 – Resize 65% - Drop Shadow
Add
you copyright information
Now merge visible
Open Animation
Shop
Paste
as new Animation
Open
SimoneAni. 310 – 317
Animation #316
Cull
– remove 1 frame every 2 frames
giving
you 12 frames
Select All
Select All copy(ctrl+a+c)
Back
to your tag Select All paste (ctrl+a+e)
Frame Properties -
15%
~~~~~~~~
Now
for your AVI
Now open a new image 150x150 pixels
I used all of
the items that was in front of my tube
resize it to144x150
pixels
Add to the 150x 150
Now add your name or initial
~~~~~~~~
Hope
you enjoyed the tutorial,
♥ Would
love to see your results ♥


This
tutorial is my own
“Linda
Atkins aka Lynx the Minx Designs”
any resemblance to any
other,
is only coincidence and not intentional.
I am using PSP
2022 Ultimate
This should work with any other PSP/Corel.
Written:
11.19.22
..........................................
I
am using a PTU CU4CU Mix,
Can be use for “Personal Use”
called “Merry Christmas”
by me “Lynx the Minx”
You can
find it at these store
“Secret
Garden Designs”,
“Twisted
Sisters Creatives”
“Picsfordesign”
“Simply
CU4U”
The
Tube I am using comes with the kit,
The Artist is “©Cartoon
Pink”
it is 42 – 1 CartoonPink.
You can find it at “CDO”
the tube is “HERE”
Font
of choice,
I am using “ Christmas Sparkles”
This is a PTU Font,
You can find it at
“Creative
Fabrica”
Mask
of choice
I am using “MPM_Mask_162”
You can find it at
“Millie's
PSP Maddness”
You
will need filter
“Vanderlee”
Drop
Shadow
Vertical:1 Horizontal:4 – Opacity: 40 – Blur: 10
Let's get started …
If
you want to animated your tag, follow this tutorial.
If not then
just duplicate your paper and close original
Open New Image 800x800 pixels – White #ffffff
Open
LTM_MerryChristmas-pp4
Copy – Paste as new layer on new
image
Close original
Layers
Load/Save Mask - Load Mask
From Disk
Layers - Merge Group
Merge Down
I
added my Tube - Resize115%
move her to the left
Front
of Tube
LTM_ merrychristmas_ele7 – Resize 40%
LTM_
merrychristmas_ele15 – Resize 50%
LTM_ merrychristmas_ele43 –
Resize 40%
LTM_ merrychristmas_ele44 – Resize 40%
LTM_
merrychristmas_ele13 – Resize 40%
Behind
Tube
LTM_merrychristmas_ele41
– Resize 85%
LTM_merrychristmas_ele30 – Resize
75%
LTM_merrychristmas_ele25 – Resize 60%
LTM_
merrychristmas_ele20 – Resize 40%
Non
Animation
If your not going to animation you can merge
visible.
Effects
Xero/Porcelain
Highlight
Your tube layer
Layers – New Raster layer
Add your copyright
information
Merge Down
Image – Resize 500 x 500 pixels
Adjust
– Sharpness – Sharpen
Now add your name
Save as png.
Add the artists name and your License number
Animation
Now
if your going to animate please add your copyright then.
Close out
of the bottom layer and merge down everything else.
Now open the
bottom layer, highlight it we are going to add snow to it.
Effects
Vanderlee/snow
Amount
44
Minimum 8
Maximum 20
Hardness 20
Transparency 0
Snow
Color – Basic Snow
Random – 0
Click ok
Copy
Merge
Open Animation Shop
Paste
as new Animation
Back
to PSP
Back arrow to remove the snow
Effects
Vanderlee/snow
Amount
44
Minimum 8
Maximum 20
Hardness 20
Transparency 0
Snow
Color – Basic Snow
Random – 440
Back to AS
Paste after current frame
Back
to PSP
Back arrow to remove the snow
Effects
Vanderlee/snow
Amount
44
Minimum 8
Maximum 20
Hardness 20
Transparency 0
Snow
Color – Basic Snow
Random – 750
Back
to AS
Paste
after current frame
We are done with this part.

Now we will animated the string of Christmas light, use magic wand.
Duplicate the layer so you have 2 layers.
On the top layer, starting with the first blub
click inside the blub and the outside edges.
Make sure you have the ants going around the blub.
Now go to the third light and do the same every other one.
Adjust
Brightness and Contrast
Brightness 90
Contrast -15
Now Selection/ Select None (Ctrl+D)
Copy go to Animation Shop Paste as new animation
Back to PSP
Do the second layer the same but start with the second blub,
then
every other blub.
Animation Shop
Paste after current
frame
Highlight the first layer copy,
Go to the second
frame and paste after current from
Frame properties
30%
Selection All
Copy
Go to tag Select All
Select
All
Paste into selected frames
Make
sure you have your frame properties at 30%
Now add your
name
~~~~~~~~
Now
for your AVI
Now open a new image 150x150
Open
LTM_merrychristmas_ele43 – Resize 200x200 pixels
Add to the 150x
150 – Resize again 85%
Now add your name or initial
~~~~~~~~
Hope
you enjoyed the tutorial,
♥ Would
love to see your results ♥


This
tutorial is my own
“Linda
Atkins aka Lynx the Minx Designs”
any resemblance to any
other,
is only coincidence and not intentional.
I am using PSP
2022 Ultimate
This should work with any other PSP/Corel.
Written: 11.15.22
..........................................
I
am using a PTU kit called “Snow Day”
by me “Lynx the
Minx”
You can find it at these store
“Secret
Garden Designs”,
“Twisted
Sisters Creatives”
“Picsfordesign”
The
Tube I am using comes with the kit,
The Artist is ©Yuki. If you
use the tube,
please use the license that from store you
purchased it from.
Font
of choice,
I am using “MamaLialia”
This is a PTU Font,
You
can find it at “Creative
Fabrica”
Mask
of choice
I am using “Monti – Mask - Circle”
You can find
it “HERE”
Animation
by “Sophisticat Simone”
You can fine it here …
“Scrappy
Bit of Fun”
You
will need filter
“Xero”
Drop
Shadow
Vertical:0 Horizontal:0 – Opacity: 100 – Blur: 10
Let's get started …
If
you want to animated your tag, follow this tutorial.
If not then
just duplicate your paper and close original
Open New Image 800x800 pixels – White #ffffff
Open
LTM_LTBC_Background 15
Copy – Paste as new layer on new
image
Close original
Layers
Load/Save Mask - Load Mask
From Disk
Layers - Merge Group
Merge Down
I
added Tube
Tube 2 – Resize 670x675 pixels
Front of
Tube
LTM_YK_element(21)
LTM_sd_element037 – Resize
45%
LTM_sd_element041 – Resize 45%
LTM_sd_element020 –
Resize 55%
LTM_pdc_WF2P_16 – Resize 65%
LTM_YK_element(06) –
Resize 75%
LTM_sd_element009 – Resize 25%
LTM_HD_IKHD_SunFunCU13
- Resize 50%
LTM_HD_EleganceSnowQueenCU24 – Resize
50%
LTM_sd_element053
Behind Tube
LTM_pcd_WF2P_22
– Resize 50%
LTM_sd_element001 – Resize 75%
LTM_pdc_WF2P_19
– Resize
75%
LTM_HD_IKHD_SunFunCU14
LTM_DD_IKHDesigns_ReSellVol308
Now
if your going to animate please merge down the elements above the
tube.
Make sure you have your copyright added.
X out (Close)
this layer.
Now merge visible the bottom layers.
Resize tag,
highlight bottom portion
Open Animation Shop
Paste
as new Animation
Open
SimoneAni. #169
Resize 470 x 297 Pixels
Cull – remove 1 frame every 2 frames
giving you 15 frames
Select All
Select All copy(ctrl+a+c)
Back to your tag Select All paste (ctrl+a+e)
Back to PSP
Copy your Tube Layer
Back to AS
Paste as new animation
Duplicate until you have 15 frames
Select All copy(ctrl+a+c)
Back to your tag Select All paste (ctrl+a+e)
Keep Frame Properties at 10%
Add
Name
No to the bottom of the page if you want to create an AVI
for yourself
For
Non animation
If your not going to animation you can merge
visible.
Effects
Xero/Porcelain
Highlight
Your tube layer
Layers – New Raster layer
Add your copyright
information
Merge Down
Image – Resize 500 x 500 pixels
Adjust
– Sharpness – Sharpen
Now add your name
Save as png.
Add the artists name and your License number
~~~~~~~~
Now
for your AVI
Now open a new image 150x150
I used all of the
items that was in front of my tube
resize it to150x103 pixels
Add
to the 150x 150
Now add your name or initial
~~~~~~~~
Hope
you enjoyed the tutorial,
♥ Would
love to see your results ♥


This
tutorial is my own
“Linda
Atkins aka Lynx the Minx Designs”
any resemblance to any
other,
is only coincidence and not intentional.
I am using PSP
2022 Ultimate
This should work with any other PSP/Corel.
Written:
11.03.22
..........................................
I
am using a PTU kit called “Thanksgiving Bounty”
by me “Lynx
the Minx”
You can find it at these store
“Secret
Garden Designs”,
“Twisted
Sisters Creatives”
“Picsfordesign”
Font
of choice,
I am using “Enjoy Thanksgiving”
This is a PTU
Font,
You can find it at “Creative
Fabrica ”
Mask
of choice
I am using “Lynx Mask-13”
You can find it “HERE”
You
will need filter
“Xero”
Drop
Shadow
Vertical:-1 Horizontal:2 – Opacity: 75 – Blur: 5
Let's get started …
Open
LTM_DBS_paper 3
Duplicate
Close Original
Layers
Load/Save
Mask - Load Mask From Disk
Layers - Merge Group
Merge Down
Added
Tube
CD-Laraine – Resize 75%
Front of
Tube
LTM_TB_element023 – Resize 75%
LTM_TB_element015
– Resize 65%
LTM_pdc_flower01 – Resize 65%
LTM_HD_12 –
Resize 60%
LTM_TB_element003 _ Resize 45%
Behind
Tube
LTM_TB_element032
LTM_ccd_mushroom1
– Reszie 50%
LTM_ccd_leaves2 – Resize 60%
Duplicate,
Image/Mirror (Merge Down)
LTM_TB_element028
– Resize 65%
Duplicate,
Image/Mirror (merge down)
LTM_HD_149
Move
it down so it is under the tube.
Next element we are going to
resize before adding it to the tag
LTM_TB_element22
resize it
to 785x374 pixels now add it to tag
LTM_TB_element24
LTM_TB_element015 – Resize 65%
LTM_pdc_CLMW1_09
– Resize 50%
Duplicate,
Image/Mirror (Merge Down)
LTM_TB_element026
– Resize 85%
Merge Visible
Effects
Xero/Porcelain
Highlight
Your tube layer
Layers – New Raster layer
Add your copyright
information
Merge Down
Image – Resize 500 x 500 pixels
Adjust
– Sharpness – Sharpen
Now add your name
Save as png.
Add the artists name and your License number
~~~~~~~~
Now
for your AVI
Now open a new image 150x150
Use LTM_TB_element004
– Resize 150x136 pixels
Add to the 150x 150
then if
needed resize to 110%
Now add your name or initial
~~~~~~~~
Hope
you enjoyed the tutorial,
♥ Would
love to see your results ♥


This tutorial is my own
“Linda Atkins aka Lynx the Minx Designs”
any resemblance to any other,
is only coincidence and not intentional.
I am using PSP 2022 Ultimate
This should work with any other PSP/Corel.
Written: 08.31.22
..........................................
I am using a PTU kit called “Kingdom of Dreams”
by me “Lynx the Minx”
You can find it at these store
or “PicsforDesign”
The
character's this the kit is by
“©Ishika Chowdhury”
Font of choice,
I am using “Snow White”
This is a PTU Font,
You can purchase it at “Creative
Fabrica”
Mask
of choice
I
am using “Lynx-Mask13”
You
can find it here
You
will need filter
“Xero”
Drop Shadow
Vertical:3
Horizontal:2 – Opacity: 80 – Blur: 10.00
This
DS will be on most the tag.
Lets get started …
Open
LTM_pp08
Duplicate
Close
Original
Layers
Load/Save
Mask - Load Mask From Disk
Layers
- Merge Group
Merge
Down
Add Elements
LTM_element
36 – Resize 300x300 pixels
LTM_element
37 – Resize 440x290 pixels
LTM_element
10
LTM_PD_IC_Home
LTM_PD_IC_Prince
– Resize 65%
LTM_PD_IC_Queen
– Resize 65%
LTM_PD_IC_Witch
– Resize 65%
The
Girl I mirrored before adding to the tag.
Image/Mirror
Horizontal
LTM_PD_IC_Girl
– Resize 65%
LTM_ccd_grass2
LTM_element
39 – Resize 65%
Duplicate
– Image/Mirror Horizontal
Merge
Down
LTM_PD_IC_MythicalDwarves
The rabbit I mirrored
before adding to the tag.
Image/Mirror
LTM_PD_IC_rabbit
– Resize 45%
LTM_element
05 – Resize 65% 2 or 3 Times
LTM_element
37 – Resize 65%
LTM_element
07 – Resize 65% 2 or 3 Times
Effects/Xero
Porcelain
I
am going to use LTM_Element 06 as my avi.
Resize
to 145
Open
a new image 150x150
add your image
add your initial
Save as png.
Now
merge all together on your tag
Layers
– New Raster layer
Add
your copyright information
Merge
Down
Image
– Resize 500 x 500 pixels
Adjust
– Sharpness – Sharpen
Now
add your name
Save as png.
Hope
you enjoyed the tutorial,
♥
Would
love to see your results ♥
I'm Protected

Designer Manager
Award

Award

Award

"Creative Fabrica"

Free CU License
LTMCreation Free CU License
Free CU License
Free DAD CU License